Mission Screen Overview
This editor provides an environment to initialize and configure SCRIMMAGE missions. From here, you can run the missions in a viewer, in batch runs, or train autonomy plugins.
Plugins
Built-in Plugins
Plugins provide a wide array of utilities for entities. A few examples of what plugins can do are:
- Allow for Entities to communicate between each other.
- Have motion models for determining movement in simulation.
- Keep track of metrics for the number of collisions
- And much more!
SCRIMMAGE contains several built-in plugins that can be used for simulations. A brief description of each built-in plugin is available in the SCRIMMAGE docs. These plugins are available in SSS, and each entity can enable these plugins.
In order to enable a plugin in an Entity, it is as simple as clicking a button:

Plugins are categorized according to their functionalities. Because some plugins provide overarching utility within the simulation, they only need to be enabled once. For instance, metric plugins that track the number of collisions with teammates would only need to be enabled in the Mission Entity in order to track all entities in the simulation. Other plugin types, such as autonomy plugins would be on a case-by-case basis for each Entity.
| Mission Entity | Entity |
|---|---|
| Interaction | Autonomy |
| Metric | Controller |
| Network | Motion Model |
| Sensor |
Plugin Variables
Once a plugin is added to the Entity's property panel, the plugin's values can be tuned for the mission. This can be done by changing the values in the input box. Alternatively, variables can be used by clicking on the button next to the input box. This provides a dynamic method of setting values for plugin properties.
TODO: Provide examples of variables and gif demoing the creation and selection of a variable.
Custom Plugins
In addition to the built-in plugins provided, custom plugins can be created and distributed. The green addition button at the top of the Plugin List will prompt you to create and name a new plugin. An editor will open up inside of SSS with the boilerplate code needed for creating your own personal plugin. An example of creating an autonomy plugin is shown below:

After creating the plugin, it will be saved in your project directory where you can reuse and distribute if you wish. The plugin will be added to the Plugin List, where you can enable it for each Mission Entity or Entity. For more information on how to create a customized plugin, please read the SCRIMMAGE docs.
Configuration Settings
At the bottom of the sidebar, there is the configuration settings button. Clicking on the button will open a list of options to choose from as shown below:
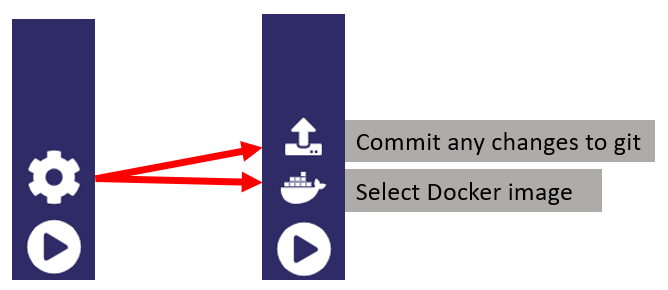
Git Commit
On startup of SSS, there is a prompt to setup Git information. The configuration setting to commit any changes to git will save the changes that you have made since your last commit. The commit dialog box will ask for you to state what changes have been made to the project since the last commit. These commits can later be pushed to a remote repository, for either distribution of a mission or for saving a backup of the project.

Select a Docker Image
There are multiple releases that have been made for SSS. These are saved as Docker images, and there may be a time where switching between these releases is necessary. SSS provides a setting so that the Docker image may be changed. A select box allows for choosing between images that are installed on your machine. Alternatively, the image can be typed in manually in the text box.

Run Mission Button
The last button in the sidebar provides the tools to run a mission in simulation, run in batch runs, or to write OpenAI scripts.
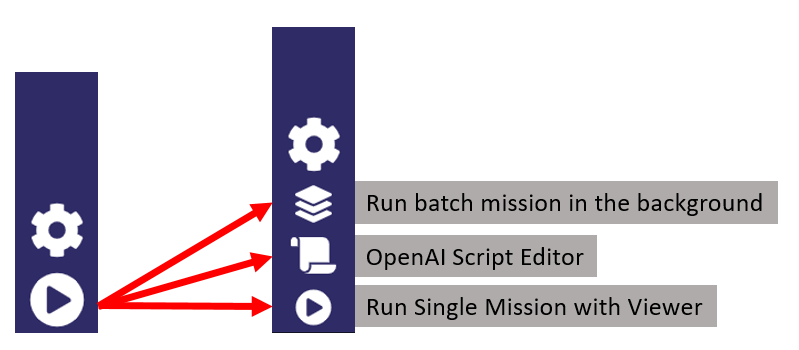
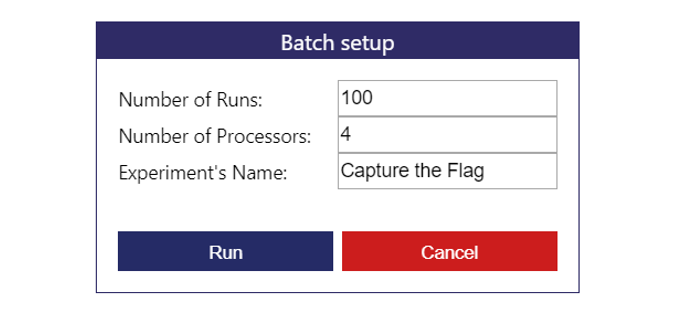
Batch Runs
To train and evaluate the efficiency of models, it is necessary to run mission in batch. Below is an example of running a mission 100 times in a batch locally, using four processors on the machine.
Run OpenAI Scripts
OpenAI Gym is a toolkit for reinforcement learning. Clicking this button will open an editor with boilerplate code for starting up an OpenAI project. This OpenAI script is saved into the project directory. Once a script has been written, it can be tested out by running a single mission with the viewer.
Run Single Mission with Viewer
Running this option will simulate your mission in a docker VNC. This utilizes a SCRIMMAGE simulation tool that allows you to view your mission at any speed that you wish (the speed can be set inside of the Mission Entity). This option is useful for debugging the mission and to assist in visualizing the scenario. TODO: gif demo pressing play and it opening the simulation.